

All Downhill From Here (Broken Guitar Shelf Tutorial)
- Mar 11, 2016
- 2 min read

Children are walking balls of germs and collateral damage. Mine is no exception. While tracking demos at 2AM, I set my acoustic guitar on the couch. My daughter came downstairs, and knocked it off of the couch completely breaking the neck on it for the SECOND TIME. I was furious, but it was my excuse to get a new one, which I did. I don't throw things away that I see potential in, so I kept the broken pieces and looked up DIY things I could do with it, the shelf ideas I came across seemed rad, so away I went.
Step 1: Hollow
Hollow out the center of the guitar, I suggest using a dremel, or a similar power saw. Doing it by hand won't get it done.


Step 2: Sanding
Sand all of the wood down, power sander and by hand for nooks.


Step 3: Shelves
Thrift stores always have these, better than dishing out a shit ton for 2 small shelves.
When we moved we didn't have much need for them so I used them. cutting off 2 inches from each end on the top shelf to accommodate the contour of the guitar's body, painting over the cut spots with black spray paint.


Step 4: Notching
Where the top shelf sits, is a support in the guitar that needed notched out. Using a power saw, sander and fine tune sanding attachment on a high speed drill I cut that fucker out of there.


Step 5: Brackets
Any Lowes, Wal-Mart or Home Depot should have these. For the top shelf i went with a cool looking die-cast design and since the bottom was hidden anyways I went with a plain support.
I had to notch out the area where the top shelf brackets go. After some measuring, a quick flick of the power saw did the trick.
After getting the right screws to fit, because the fucking ones that came with the bracket were too long, everything got drilled into place and went over with a light coat of black spray paint.


FUCK THESE SCREWS! These ones are okay!


Step 6: Chain
I used an old guitar hanger, and a chain to hang the shelf, tying it to the back end of the guitar before screwing it in.


Step 7: Hanging
I used two rope binding hooks for the wall mount.
*NOTE: For fuck sake use a stud finder before hanging anything. If not you'll be looking at a big pile of drywall and splinters on the floor.


Step 8: Finishing Touches
Looping the chains through the back of the guitar and weaving it between the wall brackets, I made it balanced, then tacking the guitar body in the wall with 1 screw for stability, last thing you want is for this thing to sway with stuff on top.

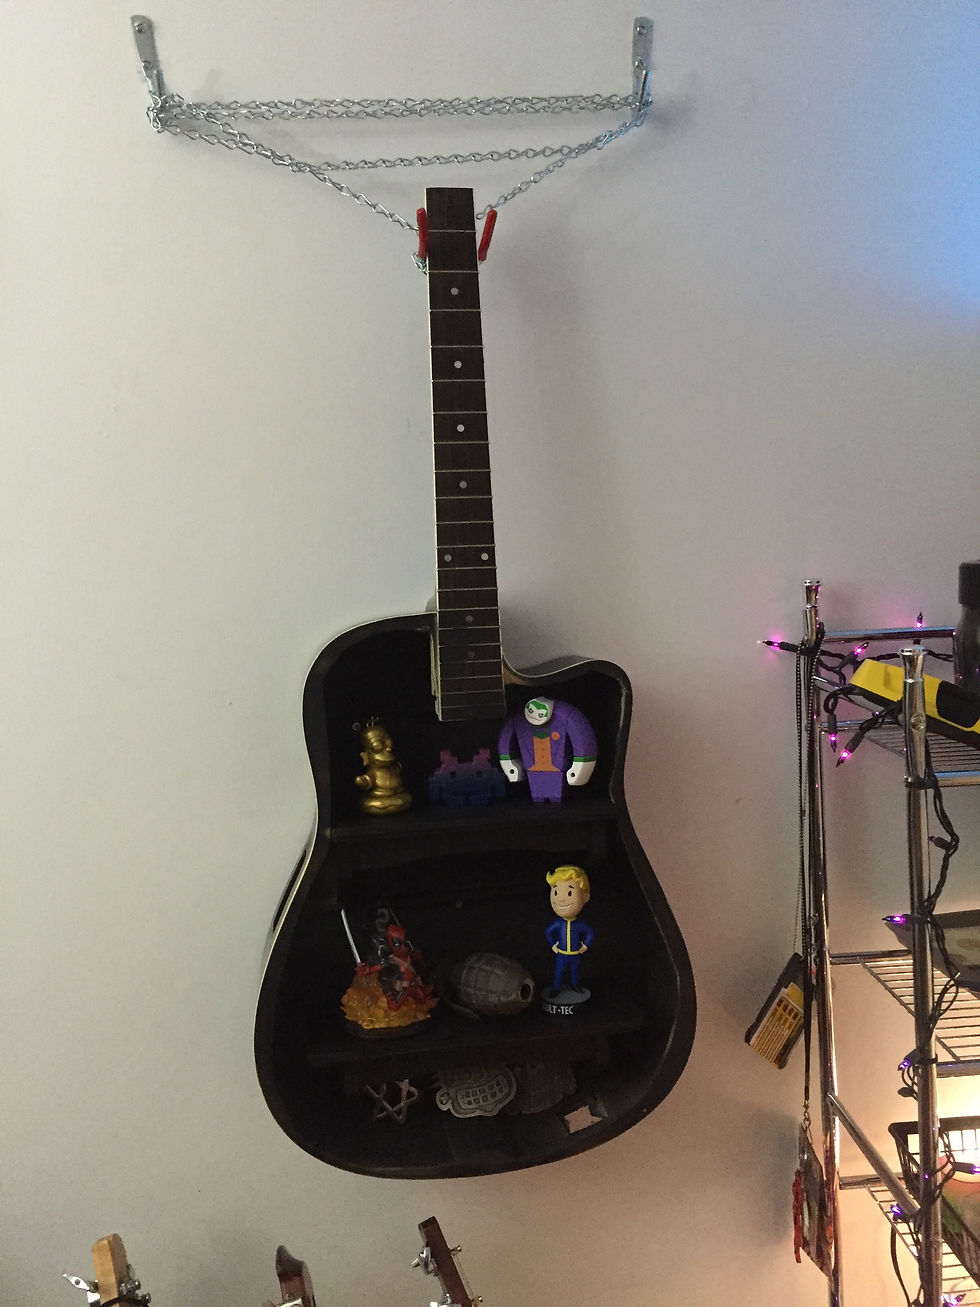
And there you have it, something that was worthless now repurposed. There are many ways to do this, this was my way. The guitar had a built in tuner and 1/4 inch jack input, where those holes are might eventually be for a light.


Comments